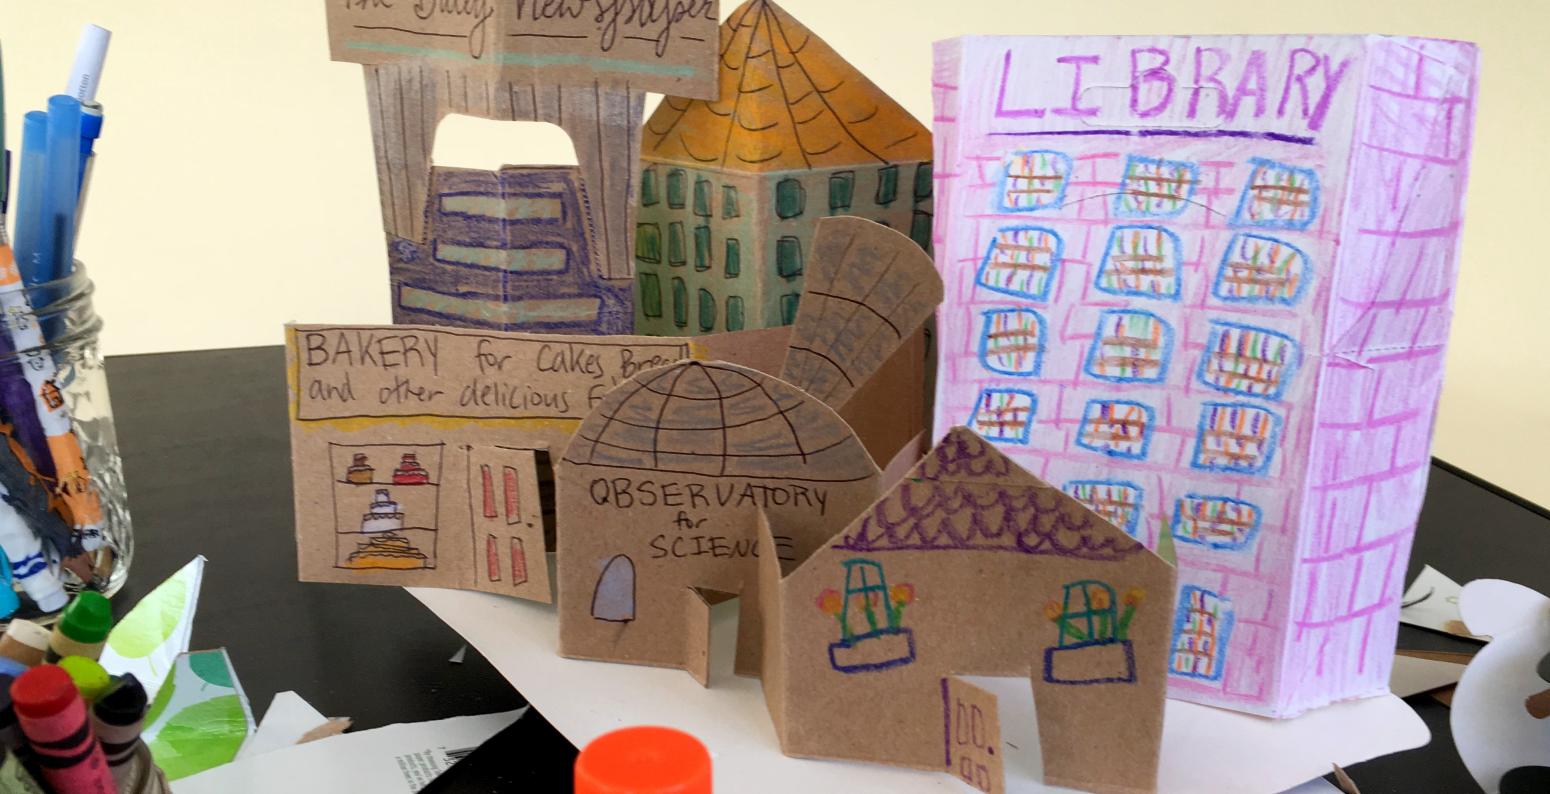
Cardboard Sculptures
This week in our At Home Art Studios, we were inspired to create three-dimensional sculptures out of cardboard. Cardboard is one of our favorite materials in the Art Studio, it is strong, flexible, and can be folded and cut as needed. In this post, we will share some of our favorite ways to work with cardboard to create settings for storytelling and spaces for play. Many of the techniques we use with cardboard will also work for creating paper sculptures, so use whatever material you have available and join in!
The first step is to find cardboard to work with. Meg found a seltzer box in the recycling bin and thought it would work well because the cardboard is thin enough to be easily cut and folded.
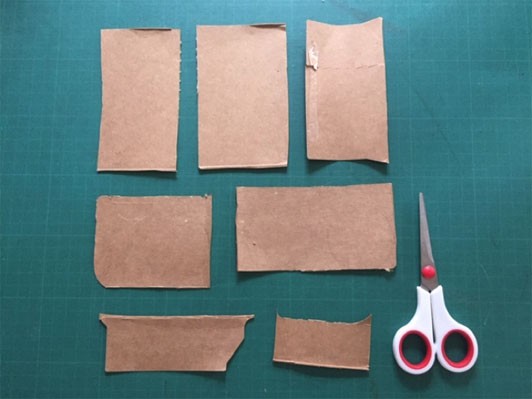
Inspired by the orchard in Bobbie’s Meadow, she cut the box into smaller flat rectangles to make trees. Once Meg had cut out the cardboard pieces, she wondered how she could make trees that stand up on their own. There are lots of ways to create three-dimensional sculptures that balance, here are some that the Art Studio team came up with.
One fold:
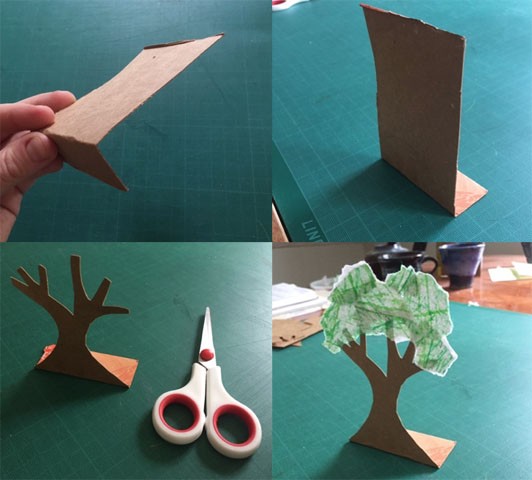
Meg folded a rectangle of cardboard once to create a tab at the bottom to act like a foot for her tree. She then cut out a tree trunk and branches and ripped some paper from her collage bin. She thought that she could tape or glue the tab to a surface if she wanted the tree to stay in place, or leave it as is to move around and combine with other objects in a scene.
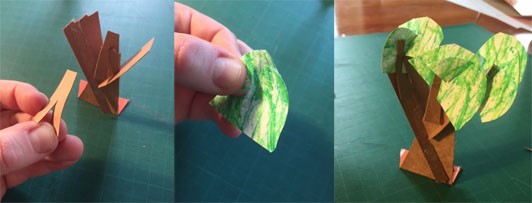
If you don’t have adhesives like tape or glue, you can attach cardboard and paper together by cutting slots and fitting them together. Here’s a tree Meg made for her orchard without using adhesives.
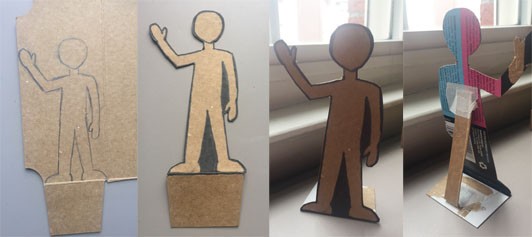
Megan was inspired to make a character who could explore the cardboard settings. She drew the character on cardboard, and used one of the folds already created by the box to make a base. Instead of trying to cut out difficult small details and interior areas, she filled them in with a black marker. She also taped a support to the back of her sculpture to help it stand.
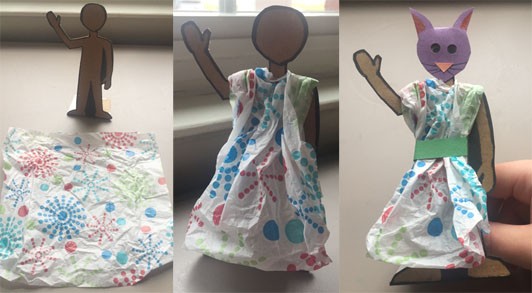
Megan used a piece of tissue paper, and crumpled it around the body to create a costume. She traced around the head and created a fun animal mask for the character out of construction paper.
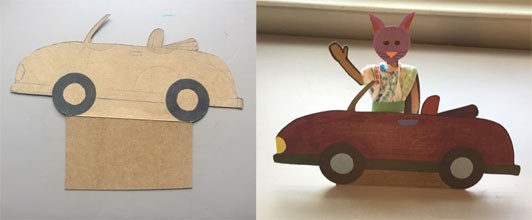
She also used cardboard to create a car for the character. Megan again used one of the folds created by the box to make the base, and decorated it with marker and construction paper.
Two or more folds:
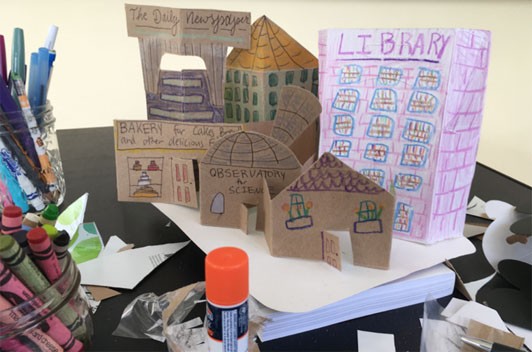
When Sara was thinking about making a cardboard sculpture, she liked the idea of creating a town that could be re-arranged and played within. She decided to balance her cardboard buildings on a cardboard base, rather than attach them, so the building locations could be changed.
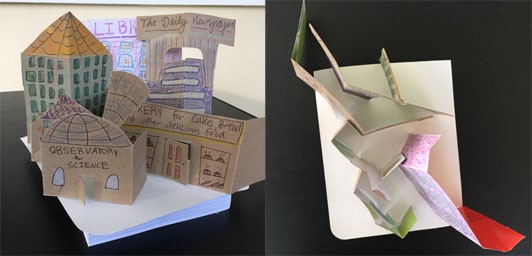
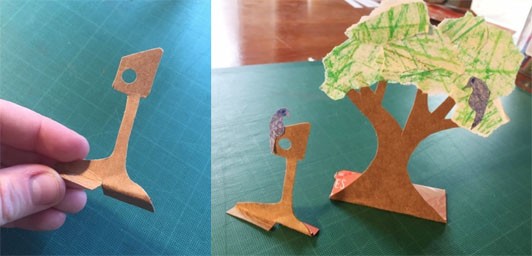
To help the buildings balance, Sara folded the cardboard so there were two or three sides to the structures. Three sides gave the buildings the most stability, but it was fun to try and balance with only two sides. Sara enjoyed thinking about what buildings she might like within her town, and designing their facades. She also discovered that drawing with crayons on brown cardboard made the buildings really vibrant.
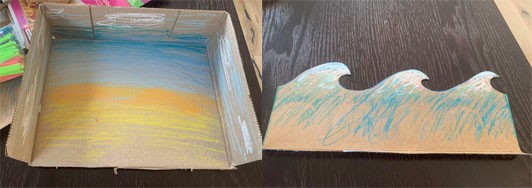
Just as Sara found that her two-sided buildings were less stable, Meg found that her one-fold trees sometimes leaned one way more than the other. To problem solve this, she experimented with creating a base with two tabs on opposite sides, like on this birdhouse. This makes the structure more balanced and less likely that the object will lean one way or the other.
Boxes and Stacking:
Mackenzie found half of a box and was inspired to create a beach scene. To begin, she cut waves out of one side of the box. She then used colored pencils to create a blue and white ocean and sky, and yellow sand.
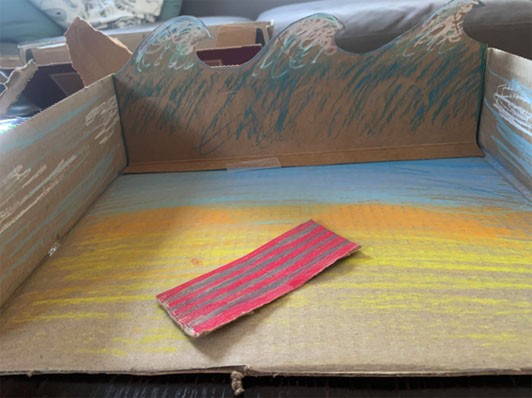
She assembled the pieces together by placing the waves panel at the back of the scene. Now Mackenzie has a seascape with interchangeable parts! She could take out the big waves in the back of the scene to reveal calm waves behind. The base of the box also provides a fantastic space to add details. One new detail she added was a scrap of striped cardboard for a beach towel.
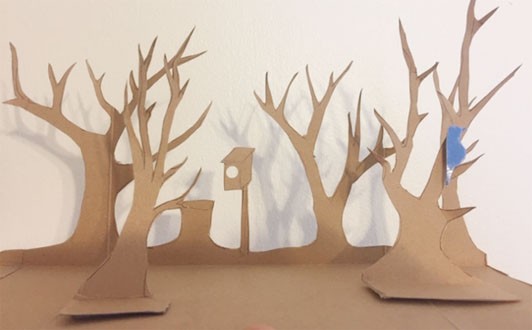
Meg also experimented with using the structure of a box to create a scene with depth. Using one side of a box, she cut out an orchard backdrop. The connected second side became the orchard’s ground. Meg then added some trees in front, taping the tabs down to the base.

Stacking is another way to create balanced structures. You can use existing cardboard boxes, or create your own building blocks. Meg taped these shapes together and then wrapped them in collage papers to create textured and patterned blocks ready to stack.
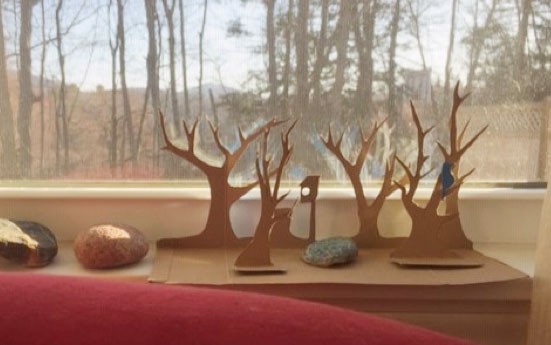
In the Art Studio, guests often contribute their artwork to a growing installation, and we find that any shelf or ledge can become a wonderful space for sharing sculptures. Meg placed her orchard and meadow sculpture on a window near where she works from home as a reminder of The Carle’s meadow outside the Art Studio window. She added some rocks to the arrangement and might add leaves to the apple trees at the same time leaves appear on trees outside her window so her installation continues to grow and change.
We look forward to seeing your three-dimensional cardboard and paper sculptures! Tag us @CarleMuseum and use #AtHomeArtStudio so we can see and share what you are making.

