
Pop-Ups and Paper Construction
This week, we invite our At Home Art Studio community to explore pop-ups! Using paper and a pair of scissors, you can create images that leap off the page and surprise the viewer. Much like lift-flaps and cut-outs, we often return to pop-ups in the Art Studio to encourage storytelling and make art that is interactive. In this post, we will show some of the pop-up techniques we’ve explored to create sculptural cards and books.
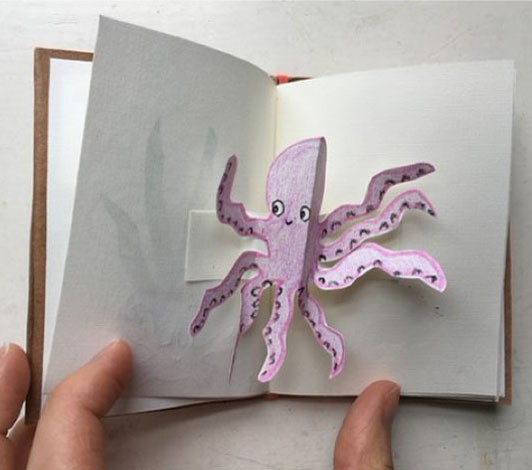
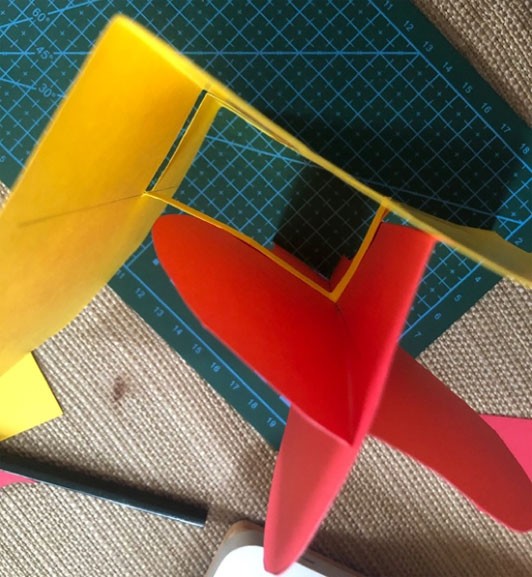
Sara made this pop-up octopus a few weeks ago, which made us realize that while pop-ups feature in many Art Studio projects, we’ve never written a blog post about them. We thought it would be a great time to explore this topic with the At Home Art Studio community.
While we provide some step-by-step instructions below, the pop-up structures we chose to explore can be used as the starting point for many kinds of sculptural storytelling.
Accordion-Fold Pop-Ups
Accordion pop-up folds are wonderful because you can add as many as you like into your card or book. To start, fold a paper in half to make the card or choose two facing pages in a book for the pop-up to appear.
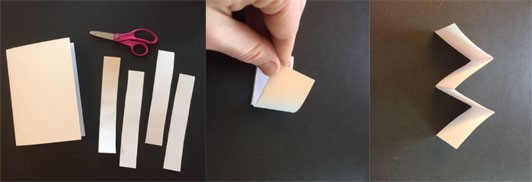
To make the accordion-fold pop-up, cut a long rectangle of paper, fold the paper in half, then fold each end back to the middle. It will look like an “M” or a “W.”
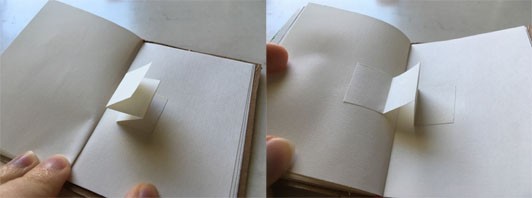
Now that you have an accordion fold, you can attach it so that it spans the gutter of your book or card. Glue or tape one end of your accordion fold onto a page of the book or card. (We recommend you glue the accordion fold close to the gutter so that your page or card can open all the way.) To attach the other end of the accordion to the facing page, put glue on it and close the card or book.
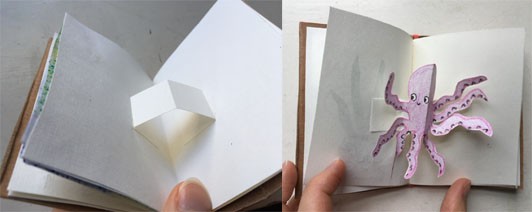
The first time Sara glued the accordion in, she realized that the tabs were visible on the page. After experimenting, she discovered that you can glue the tabs facing in rather than out, making a more hidden transition to the pop-up structure, as seen in the image above. The pop-up structure is now ready to have art added to it for surprises to pop out of the page!
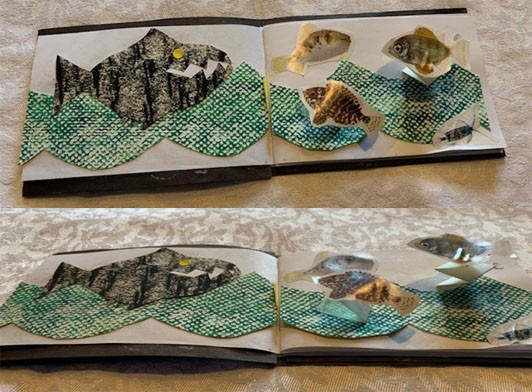
Another way you can use the accordion fold to create a pop-up is to glue only one end to the page. Janet used this technique and made her cut-out fish looked like they were leaping out of the stream!
Cut-out pop-ups
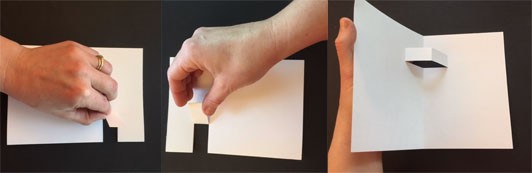
Cut-out pop-ups are great because you don’t need adhesives. To create a cut-out pop-up, cut two parallel lines in the spine of your card (or loose book pages) and then fold the tab, created by these cuts, back and forth to make a crease. Then, open the card and push the tab through to the inside to make a reverse fold.
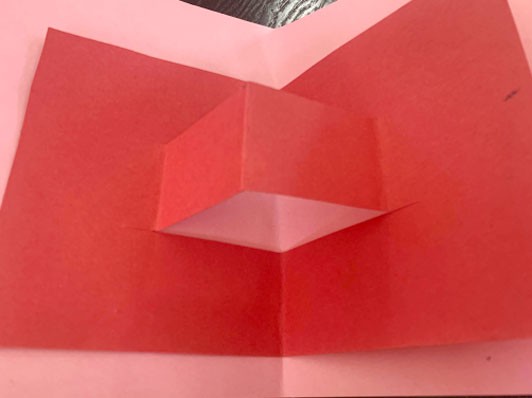
Mackenzie decided to make a pop-up card for her grandparents using the cut-out technique. She thought that it would be a fun surprise to celebrate springtime! She created a two-color card by gluing the smaller red pop-up card into a larger pink card.
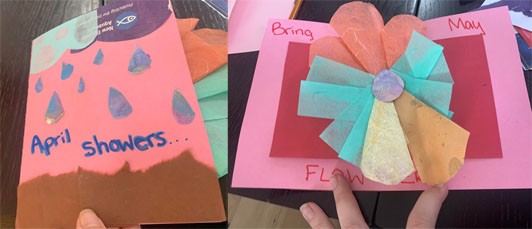
On the front of Mackenzie’s card, she used scrap watercolor paper for the raindrops, tissue paper for the ground and a cloud, and magazine paper for another cloud. Mackenzie loved how the flower on the inside of her card turned out! She made it from tissue paper and watercolor paper scraps and attached it to her pop-out structure.
Variations
Using the accordion fold and cut-out techniques as a starting point, you can begin to explore endless pop-up possibilities, Here are just some of the ways we experimented.
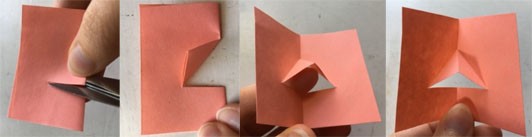
A triangle can be made by cutting one line into the spine of a folded piece of paper. After cutting the straight line, fold the paper over to make a small triangle, then open the card to push the shape through.
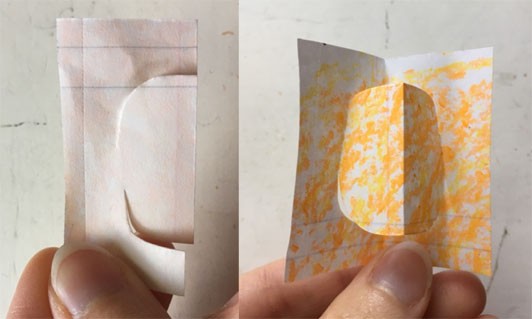
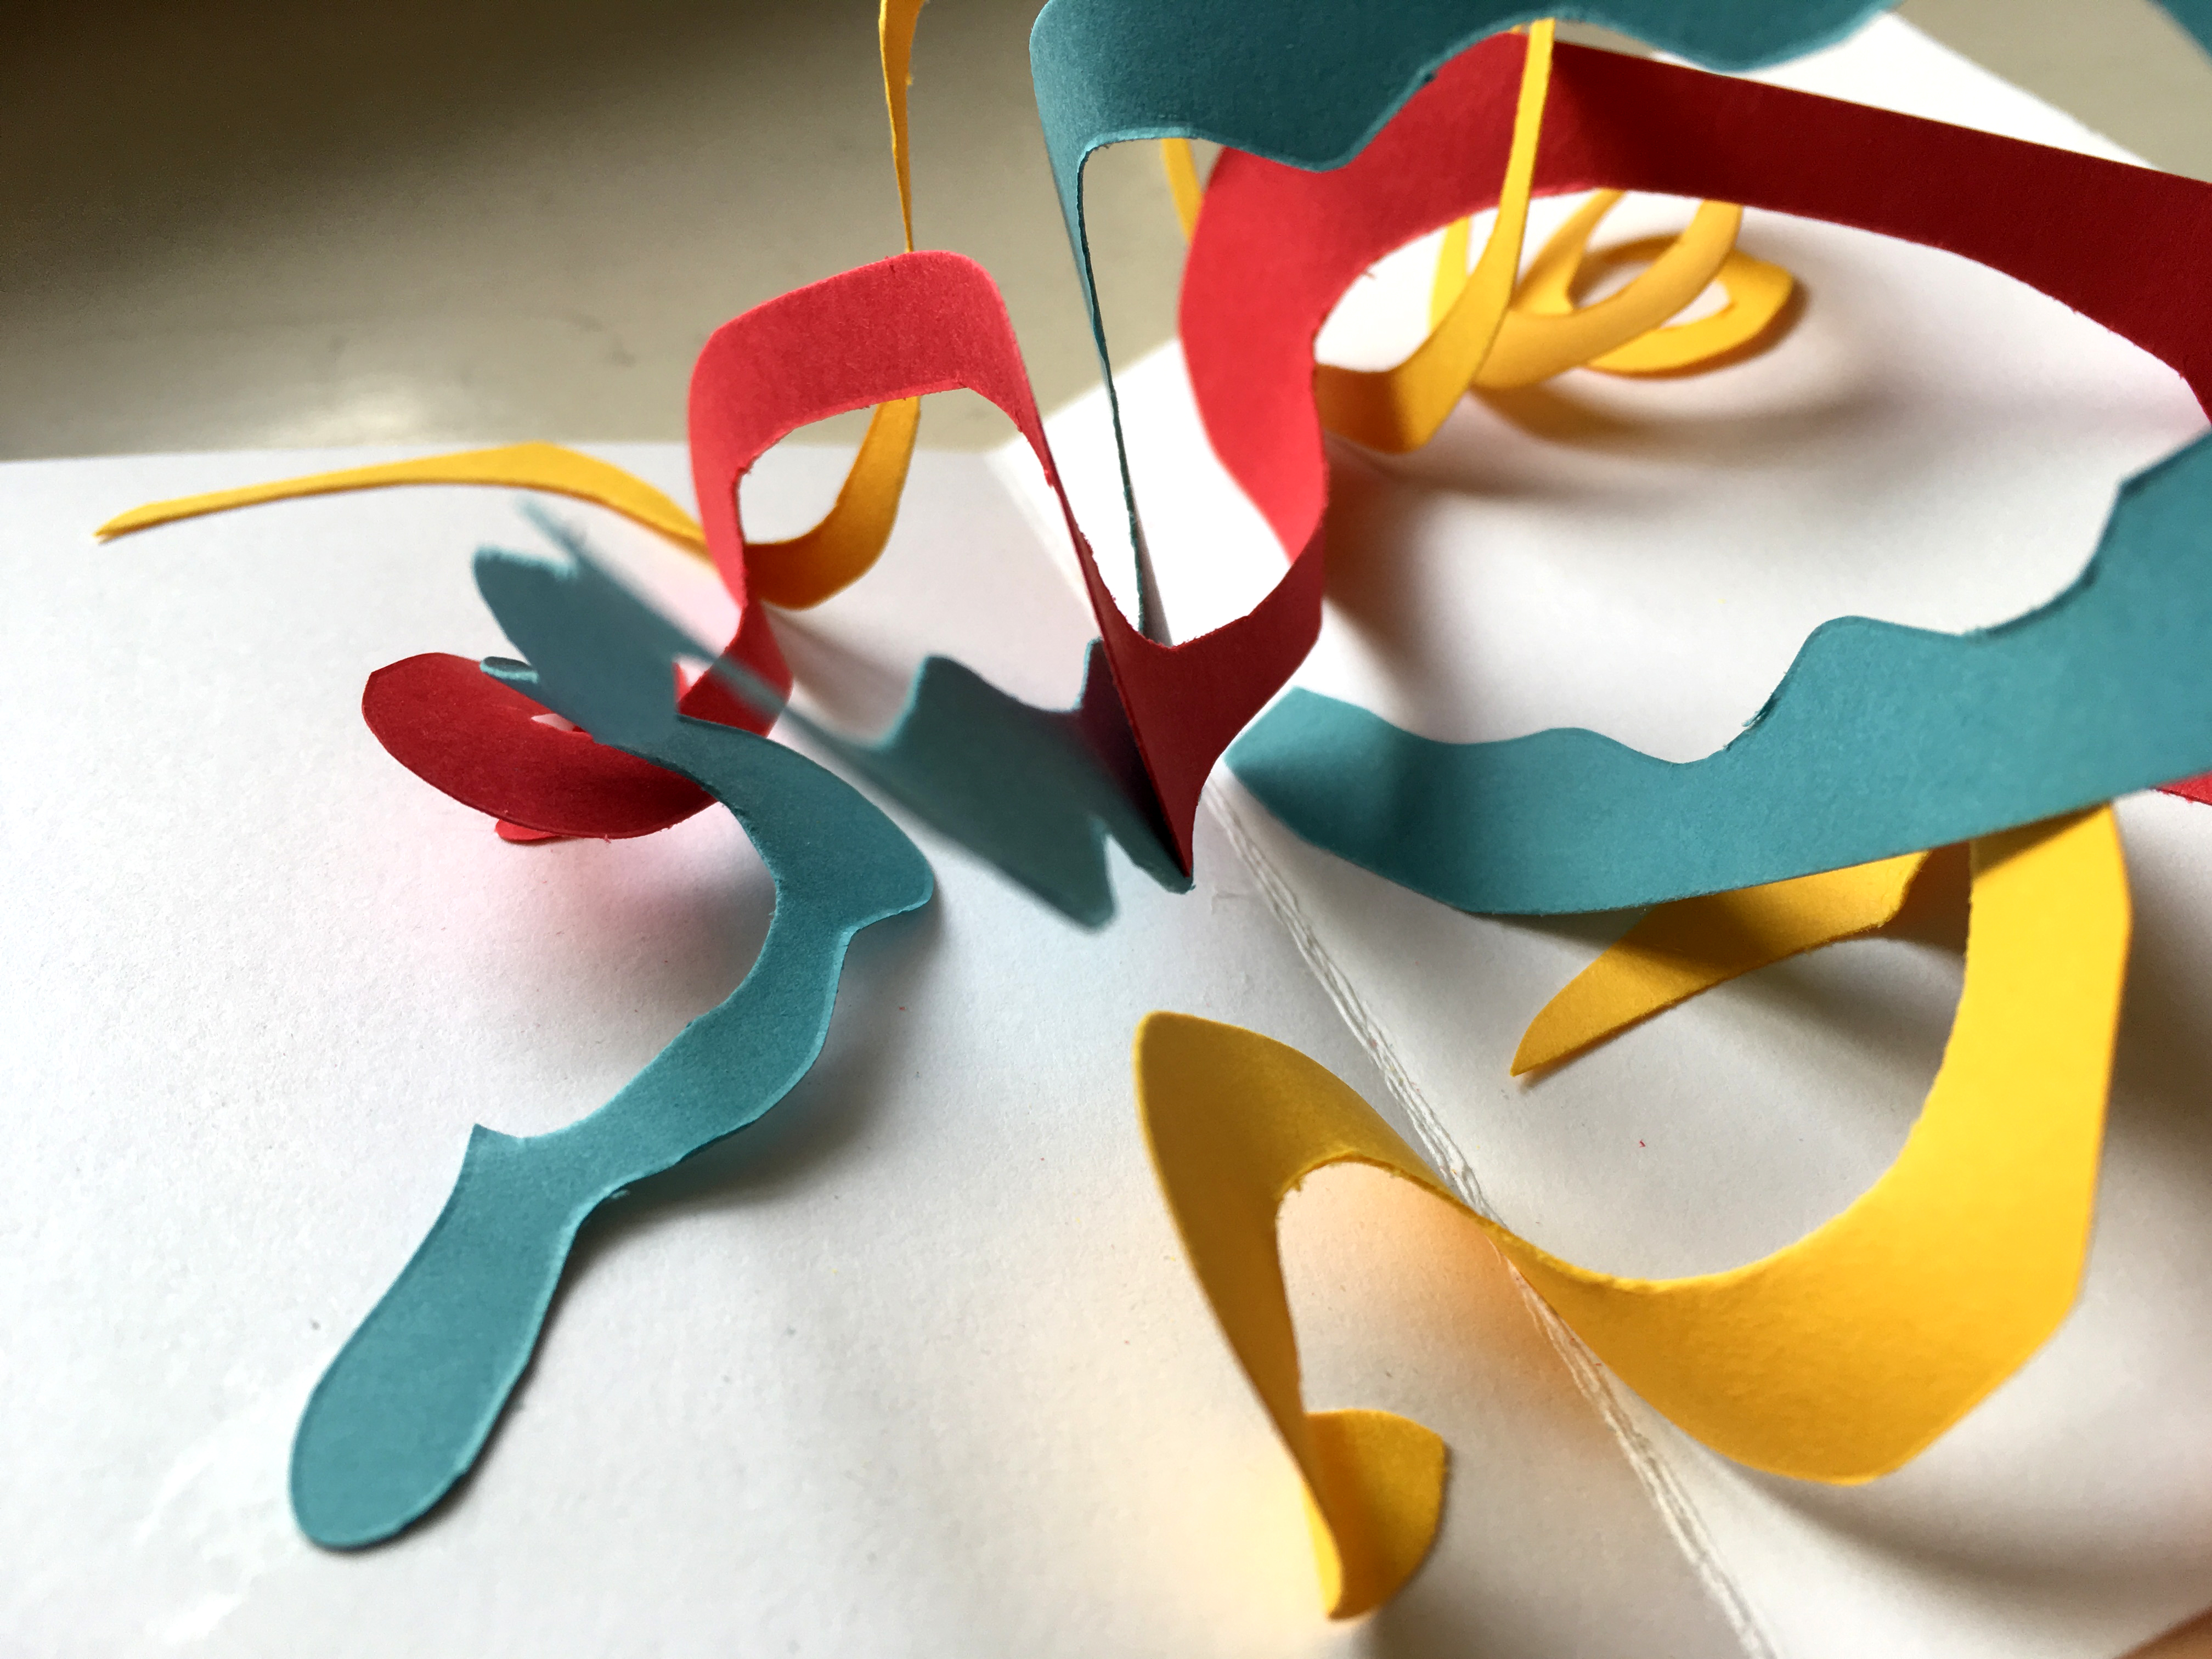
Sara learned that by cutting two lines in the fold that don’t meet, you can create a whole variety of shapes. Sara decided to make an oval shape out of her orange textured paper by cutting curved lines.
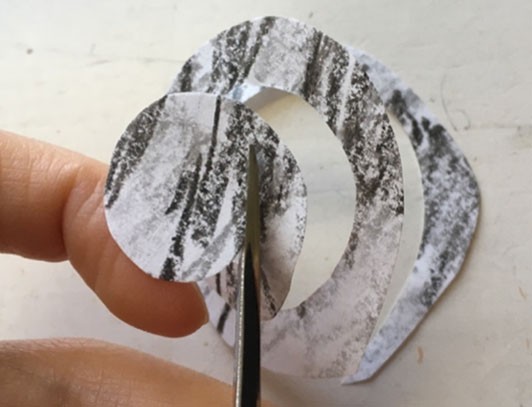
Sara also made spirals to spring out of her card.
Pop-Up Projects
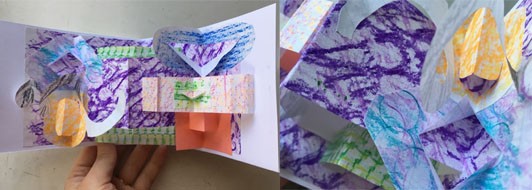
Sara combined the different shapes she had made by gluing them into a larger card. She found that the small pop-ups could be glued into any fold in the card, so some larger pop-up structures supported smaller pop-ups.
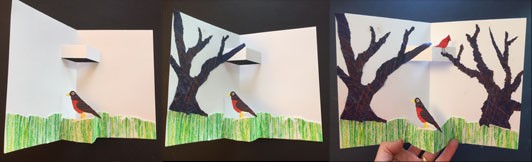
Meg decided to make a card that incorporated both the accordion-fold and cut-out techniques. Taking inspiration from the birds searching for worms outside her window, she cut a robin out of collage paper, and then glued it to the back of the pop-up structure. Then, using the cut-out at the top of the card, she created three-dimensional tree branches for a cardinal to land on. Meg collaged her trees using torn paper, which created interesting organic shapes, perfect for branches.
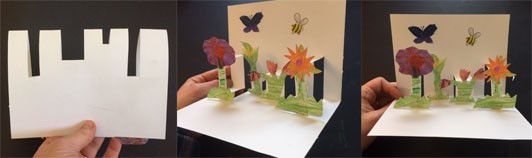
Meg wanted to try making another nature scene. This time, she oriented the card so that one page became the ground of a meadow. She cut out a series of four pop-ups, changing the lengths of her cuts to create pop-ups of different heights and depths. Gluing collaged flowers to the pop-ups created a layered landscape.
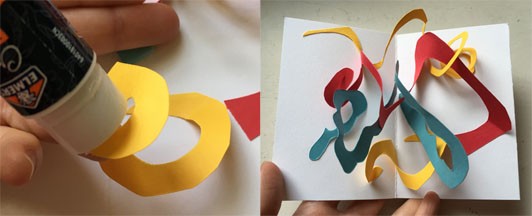
Sara enjoyed making pop-ups spirals the most. After experimenting, she noticed that the process of attaching them was similar to gluing in accordion folds. She glued one end of the spiral down to a page and applied glue to the other end of the spiral (on the side that faced up). Sara then closed the card, ensuring that the spiral was attached at both ends and spanned across the fold. She repeated this process with different spirals, changing their sizes, shapes, and colors. When she opened it up the card, the spirals were revealed inside.
Hannah loved pop-up books when she was a kid, so she started her process by looking through the pop-up books on her bookshelf.
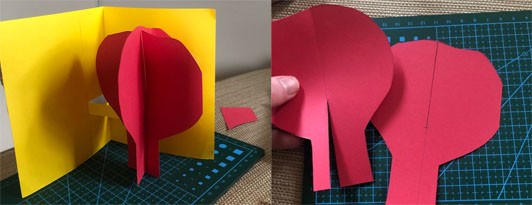
Hannah made a cut-out pop-up structure in a yellow card. She was inspired to make a tree that really popped out of her card, and decided to make a tree in two parts. She attached two red tree silhouettes together using cuts (one cut going half-way up the tree from the bottom and the other cut going half-way down from the top) and then sliding them together.
She then lined up her tree with the corner of the cut-out and glued it on.
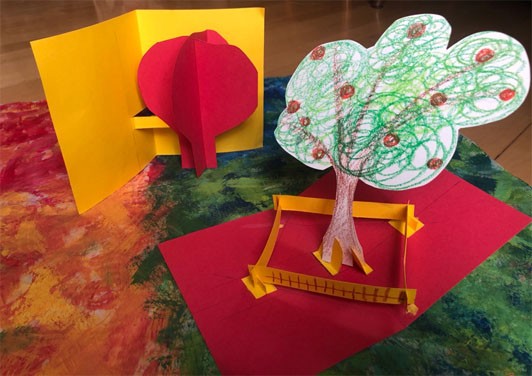
Hannah was interested in exploring other ways she could make a tree pop-up. For her second pop-up, she made a tree that grew out of the middle of the page. Hannah used a similar cut and slide technique for her paper construction. For this card, Hannah did a lot of problem-solving and experimenting. For example, she noticed that if the bases were in line across the crease of the card, the tree didn’t fold properly. To solve this problem, she moved them around to create an offset until the card closed neatly. Similarly, for the fence, she experimented with many different placements until she was happy with how it all folded when the card closed. Hannah had fun figuring out all the different elements in this design.
As we wrote and edited this post, we realized how much there is to share about pop-ups. The ideas in this post are just the start, and we know we will continue to experiment with these techniques and materials. We hope you enjoy making your own At Home Art Studio pop-ups!
