
Reflect, Refract, Reimagine!
This week in our At Home Art Studios, we were inspired to explore materials and how they interact with light. Sourcing materials from around the home, we noticed that some let the light through, others block light, and some materials even bounce light around. When held up to a light source, the appearance of the materials changed, and the view of the world around us was transformed. In this post, we will share some of the ways we created art that captures, changes, and celebrates light.
Translucent materials
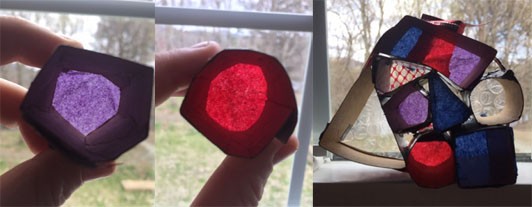
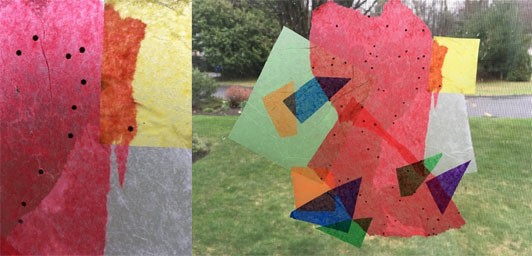
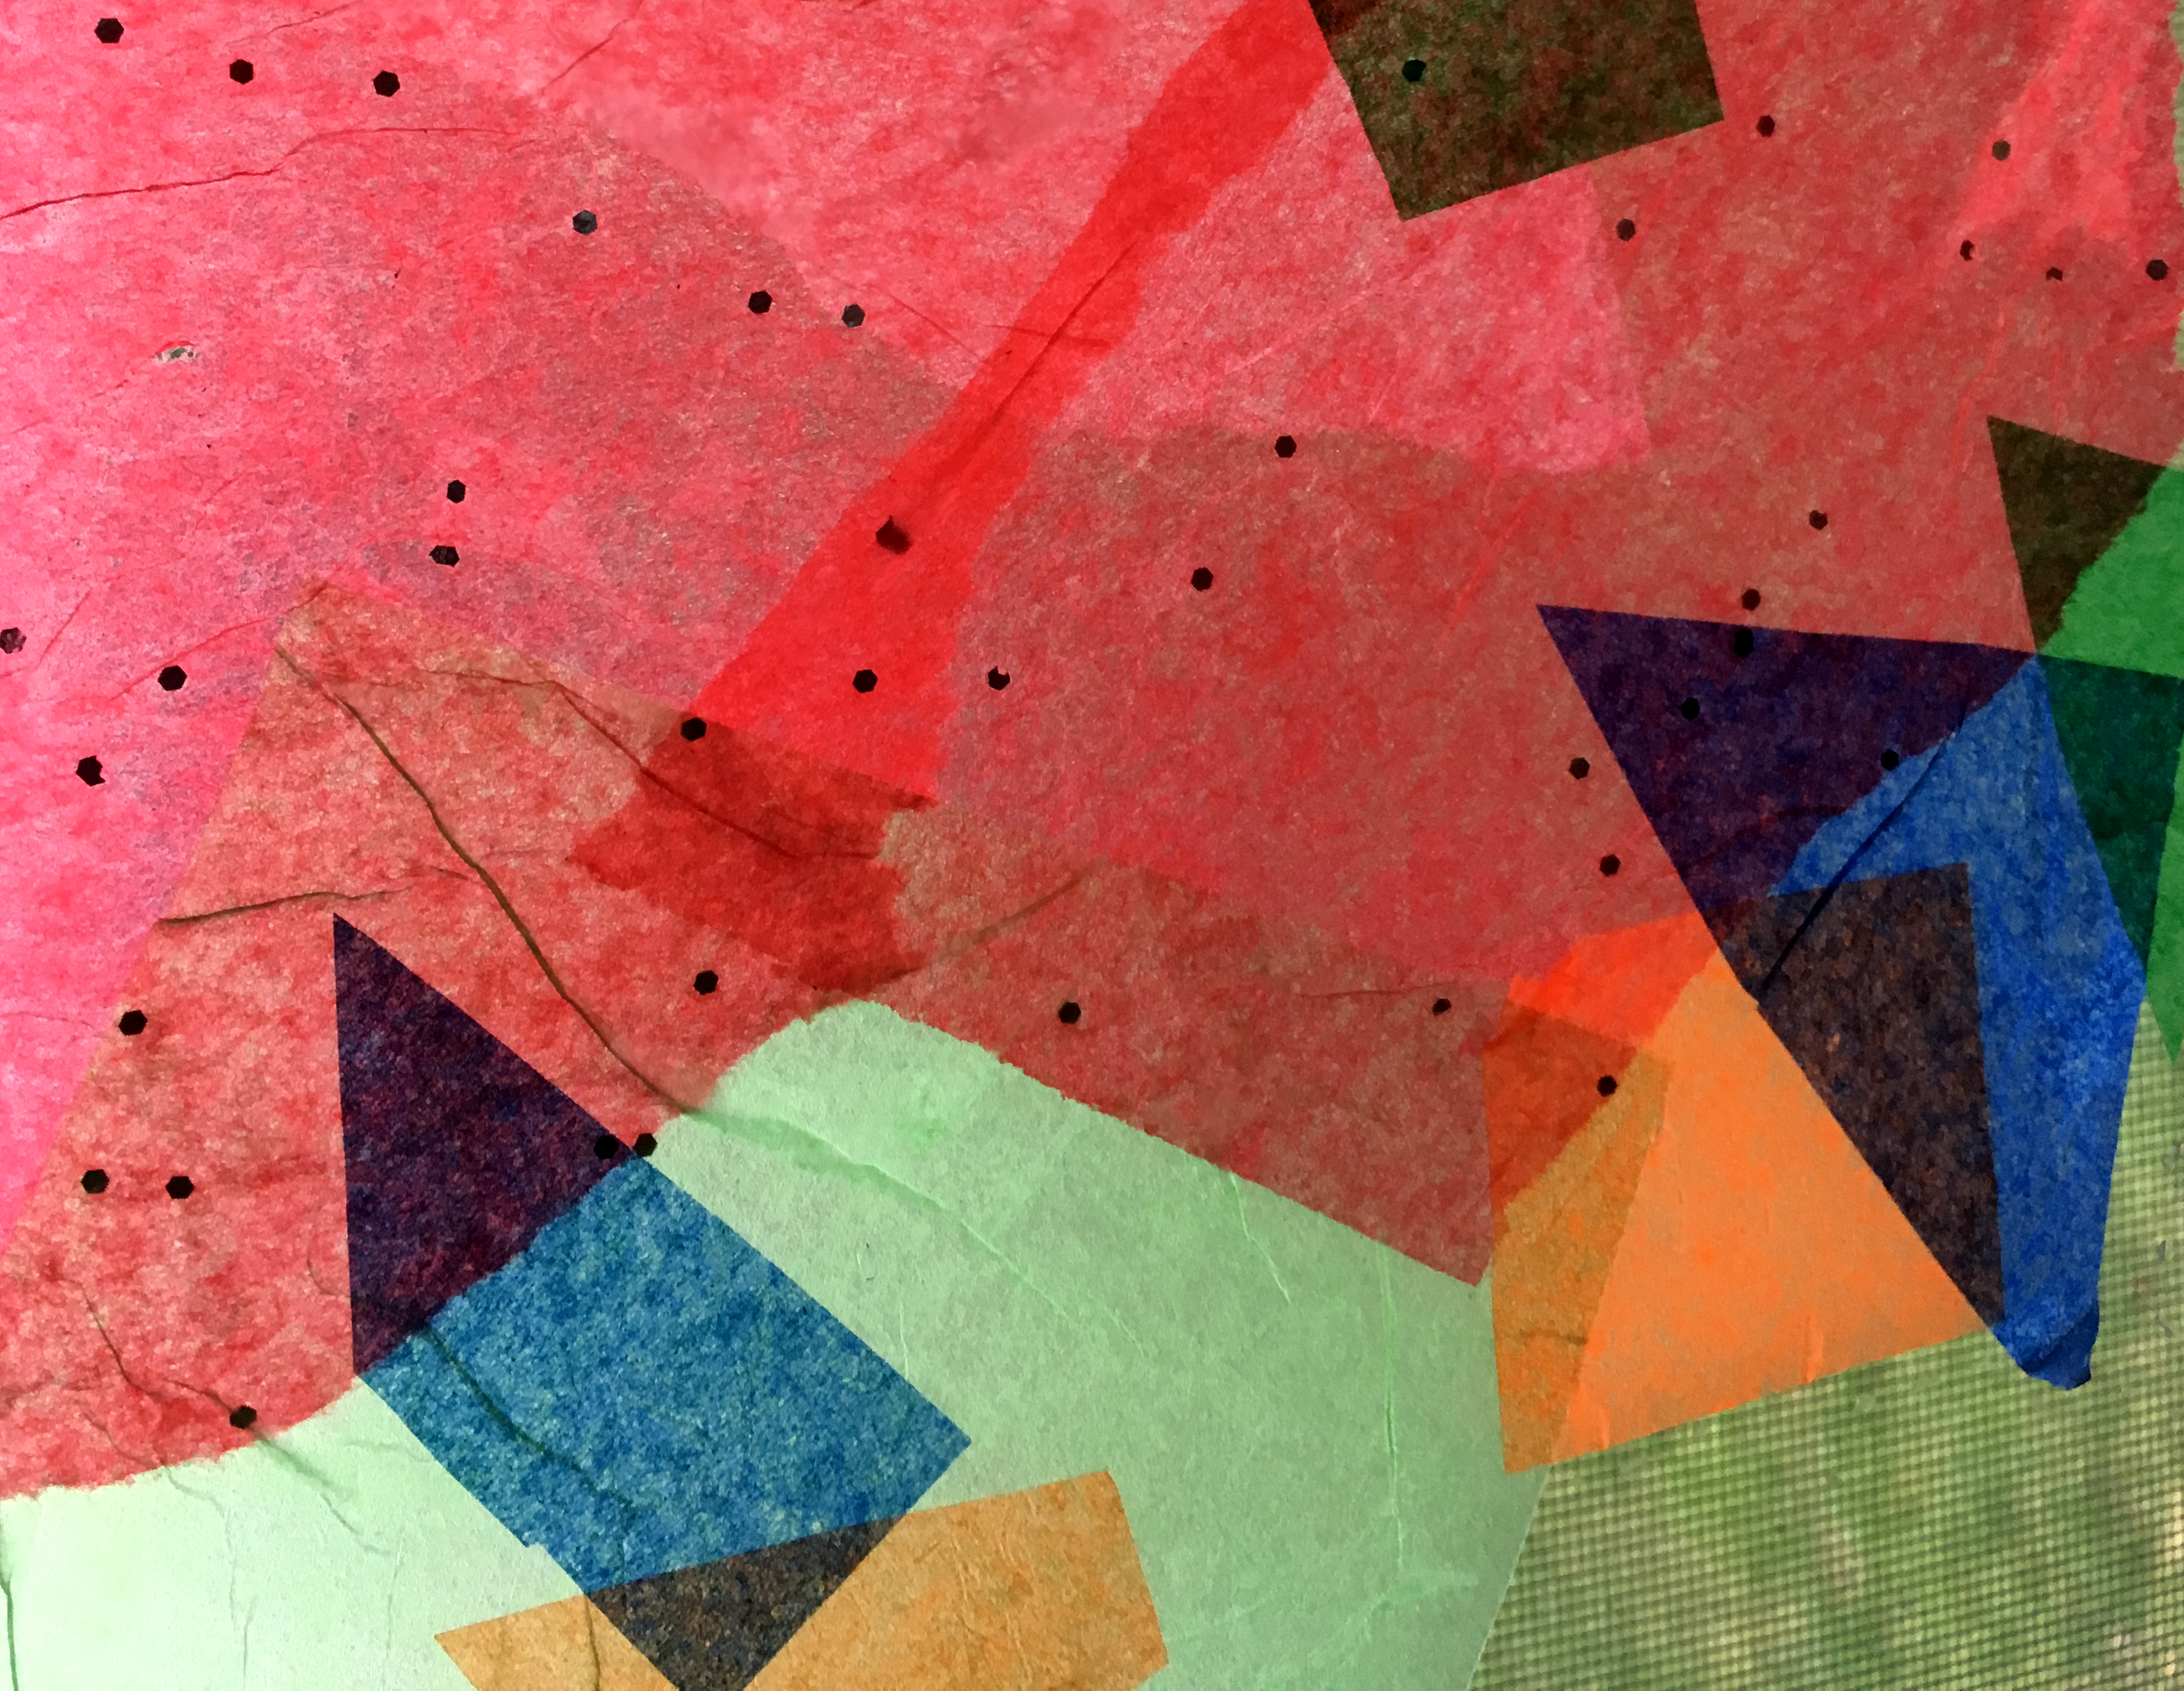
We found lots of materials that let some amount of light through, these are translucent materials. Meg taped translucent tissue paper to the end of folded and taped cardboard to create colorful shapes. Meg combined the shapes to create a stained-glass inspired sculpture that sits on a window sill.
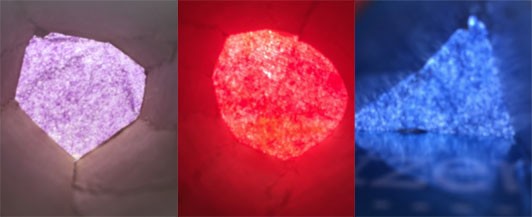
Meg found it interesting to zoom in and photograph the shapes with her phone. Up close, the tissue paper created a glowing field of color.
Opaque and Transparent Materials
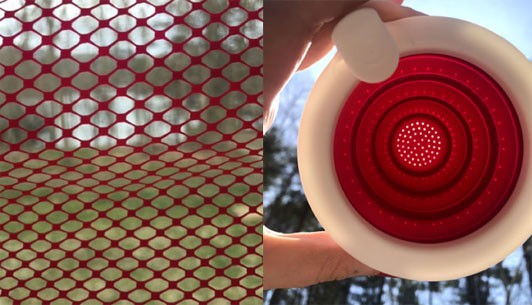
The At Home Art Studio Team also found materials that blocked the light and let the light through in different ways. When a material blocks light completely it is opaque, and when it lets light through, like glass, it is transparent. By finding opaque materials with holes in them, we created different patterns and shapes when holding them up to light. Plastic mesh created a diamond grid against a window, and a tea strainer showed rings of tiny circles when held up to sunlight.
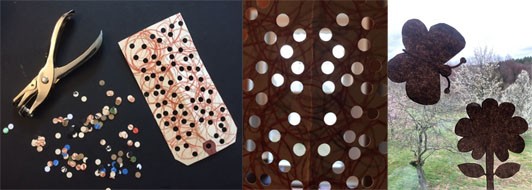
The team also created their own materials that played with the contrast between opaque and transparent. Meg punched holes in a tag and held it up to the light, and Hannah cut out shapes from a paper bag and placed them against a window to block the light and create silhouettes.
Materials that reflect and refract light
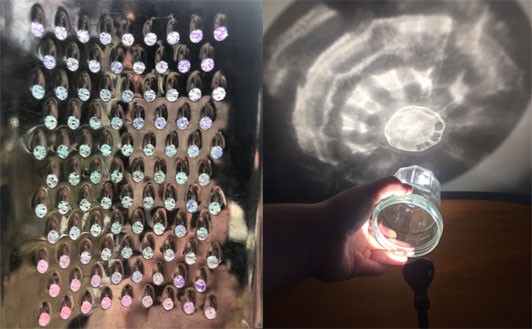
Some materials bounce or change the path of light in different ways. Siobhán held a cheese grater up to the light and noticed how its shiny surface reflected light and color. Megan experimented with how a jar bends, or refracts, light and creates a beautiful pattern on the wall.
Projects with indoor light
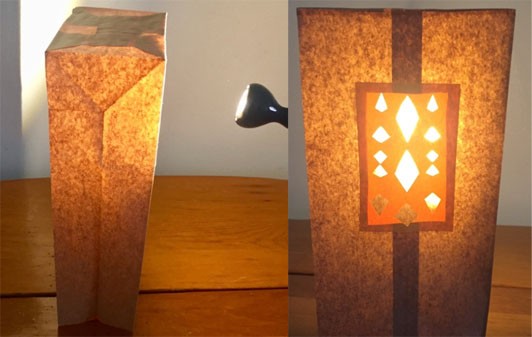
Since it was a cloudy day, Megan decided to experiment with her desk lamp as a light source. She really liked the way the brown paper lunch bag glowed in the light when it was placed a safe distance in front of the lamp. Megan cut a window in the paper bag, and decided to glue in a piece of construction paper with diamond cut-outs.
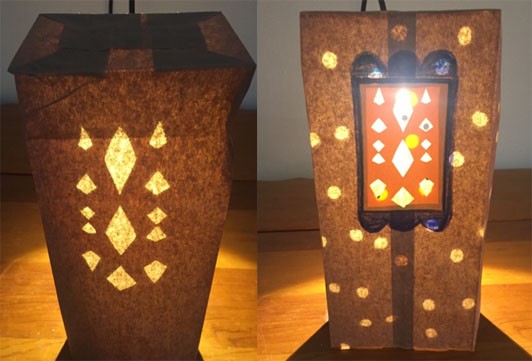
Playing with the placement of the bag, she noticed that when the window with cut-outs faced the lamp, the diamond pattern projected through to the other side. Inspired by this effect, Megan added hole punches to the bag, on the side opposite the window. When she rotated the bag again, she could see dots projected onto the side with the window. With cut-outs on both sides of the bag, Megan now has a three-dimensional light sculpture that can be viewed from multiple sides.
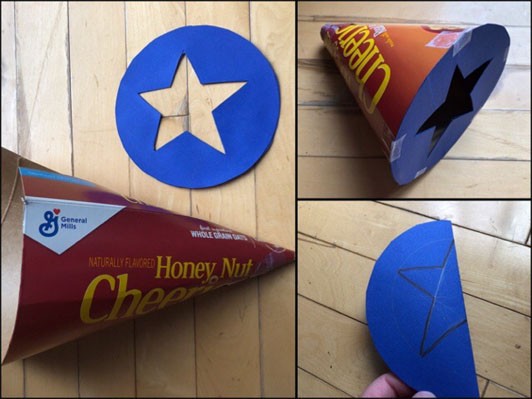
Hannah was interested in making shapes for light to shine through. She rolled a cardboard box into a cone and taped a star cut-out to the wide end. She then taped the smaller end to a flashlight to project her star around the room.
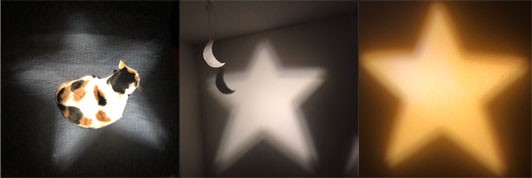
Hannah experimented further by taping translucent tissue paper over the head of the flashlight. She made orange starlight!
Projects with natural light
Sara also experimented with translucent tissue paper and was interested to see how she could stick them to her window. From previous experimentation in the Art Studio, Sara knew art paste works, but she didn’t have it at home. Inspired by the rain outside the window, she wondered if water could work. Sara used brushes and her fingers to paint with water, which stuck the paper to the window. She enjoyed seeing how the papers overlapped and created new color combinations. Sara also noticed that the water made the paper even more translucent!

Once the tissue paper was soaked through, Sara realized that you could easily tear the paper with your hands. She enjoyed poking view holes through and writing letters into the tissue paper. Overtime, the paper did dry and peel off, but Sara didn’t mind as the process was engaging and the paper could be reused after it dried.
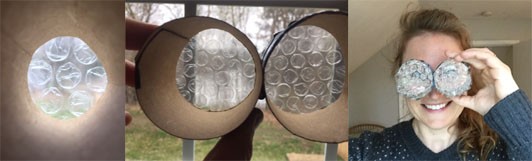
During her experiments with translucent materials, Meg noticed that bubble wrap created interesting patterns and when looked through, made the landscape blurry. This inspired her to make a pair of cardboard and bubble wrap glasses!
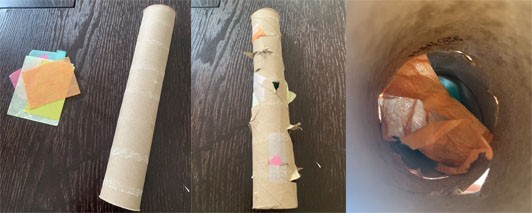
Mackenzie was also interested in looking through translucent materials and wanted to create her own kaleidoscope using tissue paper and a paper towel roll. She hoped that it would create a layered effect if she placed the tissue paper inside the tube at different intervals. Mackenzie carefully cut the paper towel roll and inserted the tissue paper. She used tape to fasten the excess parts of the tissue paper to the cardboard. Mackenzie cut into the roll to create pockets of light. The added cuts into the roll help the light go through the tissue paper. Mackenzie loves that her kaleidoscope can be viewed through both ends.
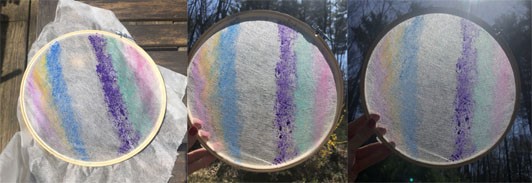
Siobhán was curious to see how her translucent fabric and added color would interact with light. She painted stripes of color on her fabric, and left part of it unpainted to compare the different effects. Siobhán then held the fabric up to the sky and observed the change in colors and light intensity.
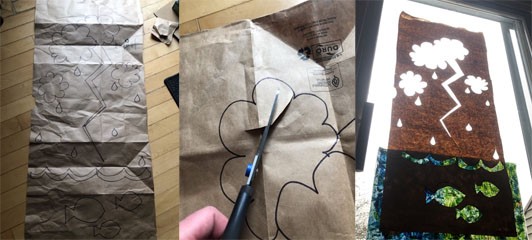
Hannah was inspired by a cloudy day to create a nature scene taped it to her window. She drew her scene, then cut it out of a paper bag. The paper blocked most of the light, providing a nice contrast for the cut-outs. Hannah was pleased with the texture of the cloudy day behind her cut-out clouds, and added a piece of painted tissue paper behind the fish and water. She loved the way the translucent paper colored the light!
There are so many ways to explore light and color using at-home materials. We hope you enjoy making your own light filled artwork.
